
A loop detector is the buried sensor that tells your automatic gate when a vehicle is present, triggering the gate to open, stay open, or reverse to avoid closing on a car. If you own or manage a property with an automatic driveway gate, understanding this device helps you appreciate why gates open on cue and why a poorly installed loop leads to frustrating false triggers and safety risks. This guide explains exactly how a loop detector works, the different jobs these loops perform at a gate, and six practical installation tips that separate a reliable system from a troublesome one.
Here is what you will learn in the sections below:
- How it works: A clear explanation of inductive loops and how they sense a vehicle at your gate.
- The six tips: Step-by-step installation guidance that prevents false detections and premature failure.
- Safety context: Where loop detectors fit within automatic gate safety and when to call a professional.
How a Loop Detector Works at an Automatic Gate
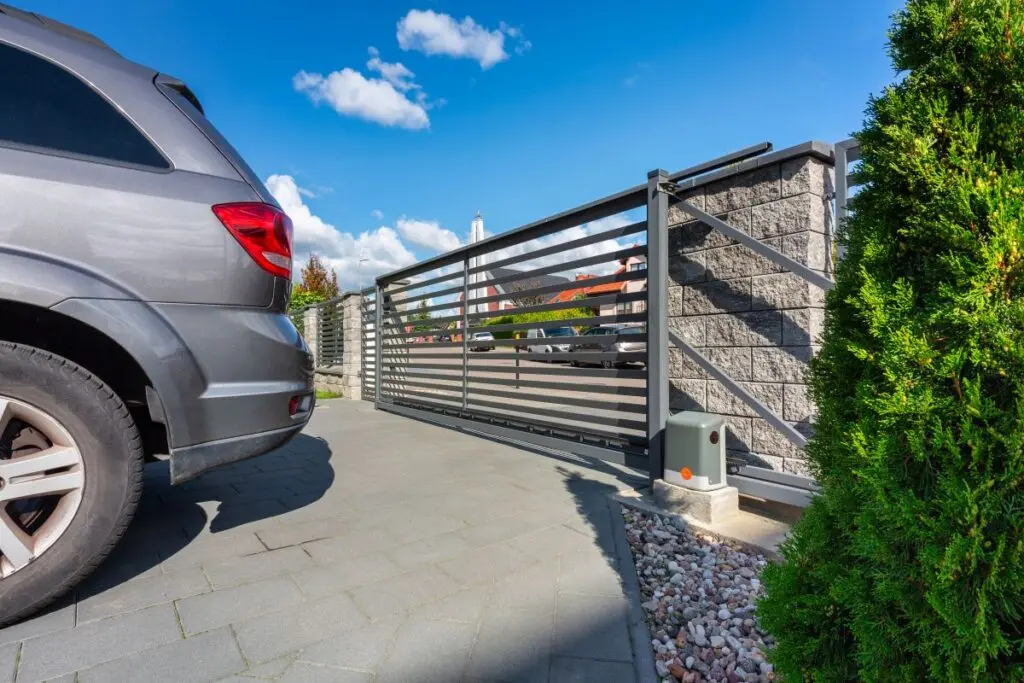
A loop detector uses a coil of wire buried in the driveway and a connected electronic module to sense the presence of a vehicle through changes in the loop’s electrical properties. Understanding the physics and the roles these loops play makes the installation tips that follow far more meaningful.
The Science Behind Inductive Loop Detection
Inductive loop detection works by running an electric current through a buried wire coil, which creates a magnetic field, and a vehicle passing over that coil changes the field in a way the detector can measure. The detector energizes the loop so it oscillates at a steady base frequency when no vehicle is present, establishing a baseline the module constantly monitors. When a large metal object like a car enters the magnetic field, it lowers the loop’s inductance, which raises the oscillation frequency, and the detector reads that shift as a vehicle. This principle is the same one used in roadway traffic signals, adapted here to control a gate reliably and automatically.
- Magnetic field: Current through the buried coil generates a field the detector monitors.
- Base frequency: With no vehicle present, the loop resonates at a steady baseline.
- Frequency shift: A vehicle’s metal lowers inductance and raises the frequency.
- Vehicle call: The detector reads that shift and signals the gate to respond.
The Different Jobs Loops Perform at a Gate
Loops at an automatic gate perform three distinct jobs, and most sites use more than one loop to handle opening, safety, and free exit functions. An exit loop sits on the inside of the gate and signals it to open automatically when a vehicle approaches from within the property. A safety or reversing loop sits directly in the gate’s path and keeps the gate from closing while a vehicle is over it, protecting both the car and the gate. A free-exit or shadow loop can hold the gate open until a vehicle has fully cleared the opening, preventing the gate from closing too soon.
- Exit loop: Opens the gate automatically for vehicles leaving the property.
- Safety loop: Prevents the gate from closing while a vehicle sits in its path.
- Shadow loop: Holds the gate open until the vehicle fully clears the opening.
- Multiple loops: Most sites combine loops to cover opening, safety, and timing.
6 Loop Detector Installation Tips for Reliable Performance
The six tips below cover the practices that most affect whether a loop detector runs trouble-free for years or generates constant false calls. Follow them in sequence, since good planning and clean cuts early on prevent the hardest problems to fix later.
1. Plan Loop Size and Placement Carefully
Planning loop size and placement carefully is the foundation of a reliable installation because loop dimensions directly affect detection sensitivity and coverage. A smaller loop area produces a larger change in inductance when a vehicle passes over it, making detection more reliable, so oversized loops can actually miss high-clearance vehicles. Position safety loops squarely in the gate’s travel path and exit loops far enough back to give the gate time to open before a vehicle arrives. Mapping out every loop’s purpose and location before cutting pavement avoids costly rework and ensures each loop does its job.
- Right-size the loop: Smaller loops sense vehicles more reliably than oversized ones.
- Purposeful placement: Set safety loops in the path and exit loops well back.
- Plan first: Map all loop locations before cutting to avoid rework.
- Cover large gates: Use multiple loops to span wide openings evenly.
2. Cut Clean, Correctly Sized Saw Slots
Cutting clean, correctly sized saw slots in the pavement protects the loop wire and keeps the loop performing consistently over time. The slot should be deep and wide enough to hold the required number of wire turns plus sealant, typically cut with corners chamfered at 45 degrees so the wire is not damaged at sharp angles. A shallow or ragged cut leaves the wire vulnerable to traffic, water, and cracking, which are leading causes of premature loop failure. Taking time to make precise cuts and remove debris before laying wire pays off in years of dependable operation.
- Adequate depth: Cut deep enough for the wire turns plus protective sealant.
- Chamfer corners: Angle corner cuts to prevent damaging the wire.
- Clean the slot: Clear debris and water before laying the wire.
- Protect the wire: A proper slot shields wire from traffic and cracking.
3. Use the Correct Number of Wire Turns
Using the correct number of wire turns tunes the loop’s inductance so the detector reads vehicles accurately without false calls. The right turn count depends on loop size, with smaller loops needing more turns and larger loops needing fewer to reach the detector’s optimal inductance range. Too few or too many turns push the loop outside that range, causing missed vehicles or erratic triggering that frustrates every user. Following the detector manufacturer’s turn chart for your specific loop dimensions is the simplest way to get this right the first time.
- Match turns to size: Smaller loops need more turns; larger loops need fewer.
- Hit the range: Correct turns keep inductance in the detector’s ideal window.
- Avoid extremes: Too few or too many turns cause missed or false detections.
- Follow the chart: Use the manufacturer’s turn guide for your loop size.
4. Seal the Loop Against Moisture
Sealing the loop against moisture is essential because water intrusion is one of the most common reasons loop detectors fail over time. After laying the wire in the slot, fill it completely with a quality loop sealant that keeps water away from the wire and locks it firmly in place against vibration. Moisture reaching the wire degrades the insulation and shifts the loop’s readings, producing intermittent faults that are difficult to trace later. A thorough seal also protects the loop from freeze-thaw cycles and road salt, which are especially punishing in cold Midwest winters.
- Full seal: Fill the slot completely so no water reaches the wire.
- Quality sealant: Use a product rated for loop and pavement use.
- Prevent drift: Sealing locks the wire and keeps readings stable.
- Weather defense: A good seal resists freeze-thaw and road salt damage.
5. Isolate Adjacent Loops to Prevent Crosstalk
Isolating adjacent loops prevents crosstalk, the interference that happens when two nearby loops operate at the same frequency and disrupt each other’s readings. When loops sit close together, their magnetic fields can overlap, causing false detections or false drops that make a gate behave unpredictably. Setting each nearby loop to a different frequency on the detector, and spacing loops appropriately, keeps their fields from interfering. Addressing crosstalk during installation avoids one of the most confusing troubleshooting scenarios a gate owner can face.
- Vary frequencies: Set adjacent loops to different frequency settings.
- Space loops out: Keep nearby loops far enough apart to limit overlap.
- Prevent false calls: Isolation stops interference-driven triggering.
- Simplify service: Handling crosstalk early avoids baffling faults later.
6. Protect and Test the Lead-In Wire
Protecting and testing the lead-in wire, the run that connects the loop to the detector, ensures the whole system communicates reliably. Twist the lead-in wire pair to cancel electrical noise, run it through conduit for protection, and keep the run as short as practical to preserve signal quality. Before closing everything up, test the loop’s inductance and resistance with a meter and confirm the detector reads vehicles cleanly. A protected, verified lead-in wire is the final link that turns a well-built loop into a dependable detection system.
- Twist the pair: Twisting the lead-in wire cancels electrical interference.
- Use conduit: Protect the lead-in run from damage and moisture.
- Keep it short: Shorter lead-in runs preserve signal quality.
- Test before sealing: Verify inductance, resistance, and clean detection.
Loop Detectors and Automatic Gate Safety
Loop detectors add convenience and help protect vehicles, but they work alongside a broader set of safety requirements that govern how automatic gates must operate. Understanding this context clarifies both what a loop detector does and where its role ends.
Where Loop Detectors Fit in Gate Safety
Loop detectors primarily protect vehicles and control gate timing, while dedicated entrapment protection devices are what guard people from a moving gate. A safety loop keeps a gate from closing on a car, but industry safety standards require separate entrapment protection, such as photo eyes or contact edge sensors, to protect pedestrians and prevent injury. According to the Door and Access Systems Manufacturers Association, a vehicular gate operator must be supplied with at least two independent means of entrapment protection. Recognizing that a loop detector complements, rather than replaces, these safety devices is essential for a compliant and safe gate.
- Vehicle focus: Loops protect cars and manage gate timing, not pedestrians.
- Separate protection: Photo eyes or edge sensors guard people from the gate.
- Two independent means: Vehicular gate operators require dual entrapment protection.
- Complementary role: Loop detectors work alongside, not instead of, safety sensors.
Why Professional Installation Matters
Professional installation matters because loop detectors combine pavement work, precise electrical tuning, and integration with a gate operator’s safety system that must function flawlessly. A trained installer sizes and places each loop correctly, tunes the detector, seals the wire against the elements, and confirms the loops work in concert with the gate’s required safety devices. Because a gate that misreads vehicles can strand a car in its path or fail to open on cue, the margin for error is small. Working with an experienced local professional ensures the entire system is reliable, compliant, and built to last.
- Precise tuning: Installers set loop size, turns, and frequency correctly.
- Weatherproofing: Professionals seal loops against moisture and salt.
- System integration: Loops are coordinated with the gate’s safety devices.
- Lasting reliability: Expert work prevents false calls and premature failure.
Frequently Asked Questions About Loop Detectors
How much does a loop detector installation cost?
Loop detector installation typically ranges from about $300 to $900 per loop installed, depending on the number of loops, pavement type, and how much cutting and sealing the site requires. Adding multiple loops for exit, safety, and free-exit functions raises the total. Request an itemized quote so you can see the detector, wire, and labor separately.
How long does a loop detector last?
A properly installed and sealed loop detector loop can last 10 to 20 years or more, since the buried wire has no moving parts to wear out. Lifespan depends heavily on installation quality, pavement condition, and moisture protection. Cracking pavement and water intrusion are the most common causes of early failure.
Can I install a gate loop detector myself?
Loop detector installation is not recommended as a do-it-yourself job because it requires precise pavement cutting, correct wire tuning, and integration with the gate’s safety system. Errors commonly cause false detections or missed vehicles that make the gate unreliable. Professional installation ensures the loop is tuned, sealed, and coordinated with required safety devices.
Why does my gate loop detector keep giving false readings?
False readings usually come from moisture in the loop, crosstalk between nearby loops set to the same frequency, or a damaged lead-in wire. Water degrading the wire insulation is the most frequent culprit. A technician can test the loop’s inductance and resistance to pinpoint whether the issue is the loop, the frequency setting, or the wiring.
Do loop detectors replace gate safety sensors?
No, loop detectors do not replace gate safety sensors, since loops primarily protect vehicles and control timing rather than protecting people. Industry standards require separate entrapment protection such as photo eyes or edge sensors. A loop detector works alongside these devices as part of a complete, compliant gate system.
What is the difference between an exit loop and a safety loop?
An exit loop sits inside the property and signals the gate to open when a vehicle approaches, while a safety loop sits in the gate’s path and prevents it from closing on a vehicle. Many gates use both, along with a free-exit loop that holds the gate open until the vehicle clears. Each loop serves a distinct function in reliable gate operation.
Why Cheney Door Is Your Best Choice for Loop Detector Installation
When you need an automatic gate that opens on cue and never closes on a vehicle, Cheney Door brings the expertise to install and tune loop detectors the right way. Locally owned and family-run since 1971, our team has spent more than five decades installing and servicing gate and door systems across the region, and we back our work with 24/7 emergency service so a gate that will not open or close is never left unattended. Our technicians handle every detail from sizing and placing each loop to sealing the wire against harsh Midwest weather and integrating the detector with your gate’s required safety devices. Because a dependable loop detector depends on precise cutting, correct tuning, and proper coordination with entrapment protection, trusting the work to a seasoned local professional protects both your investment and everyone who uses the gate. Reach out to Cheney Door today for expert guidance on your automatic gate, and request your free quote to get a loop detection system built for reliable, lasting performance.